People
People is your contact list. Every customer who messages you, is imported, or comes in from an integration gets a profile here.
A person is one customer record. Conversations, events, tags, custom fields, wallet balance, and consent all hang off that record. Open People in the sidebar to search the list, open a profile, or add someone by hand.
Before you start
- Viewing people needs read access to customers. Adding, editing, and deleting need the matching create, update, and delete permissions. See Roles and permissions.
- Your plan sets how many contacts you can have. Adding a person by hand is blocked once you reach it. See Plans.
- People are also created automatically when a new customer messages you, when a lead form is submitted, and when a connected store or the API sends customers. See Integrations and Ingestion.
Find people
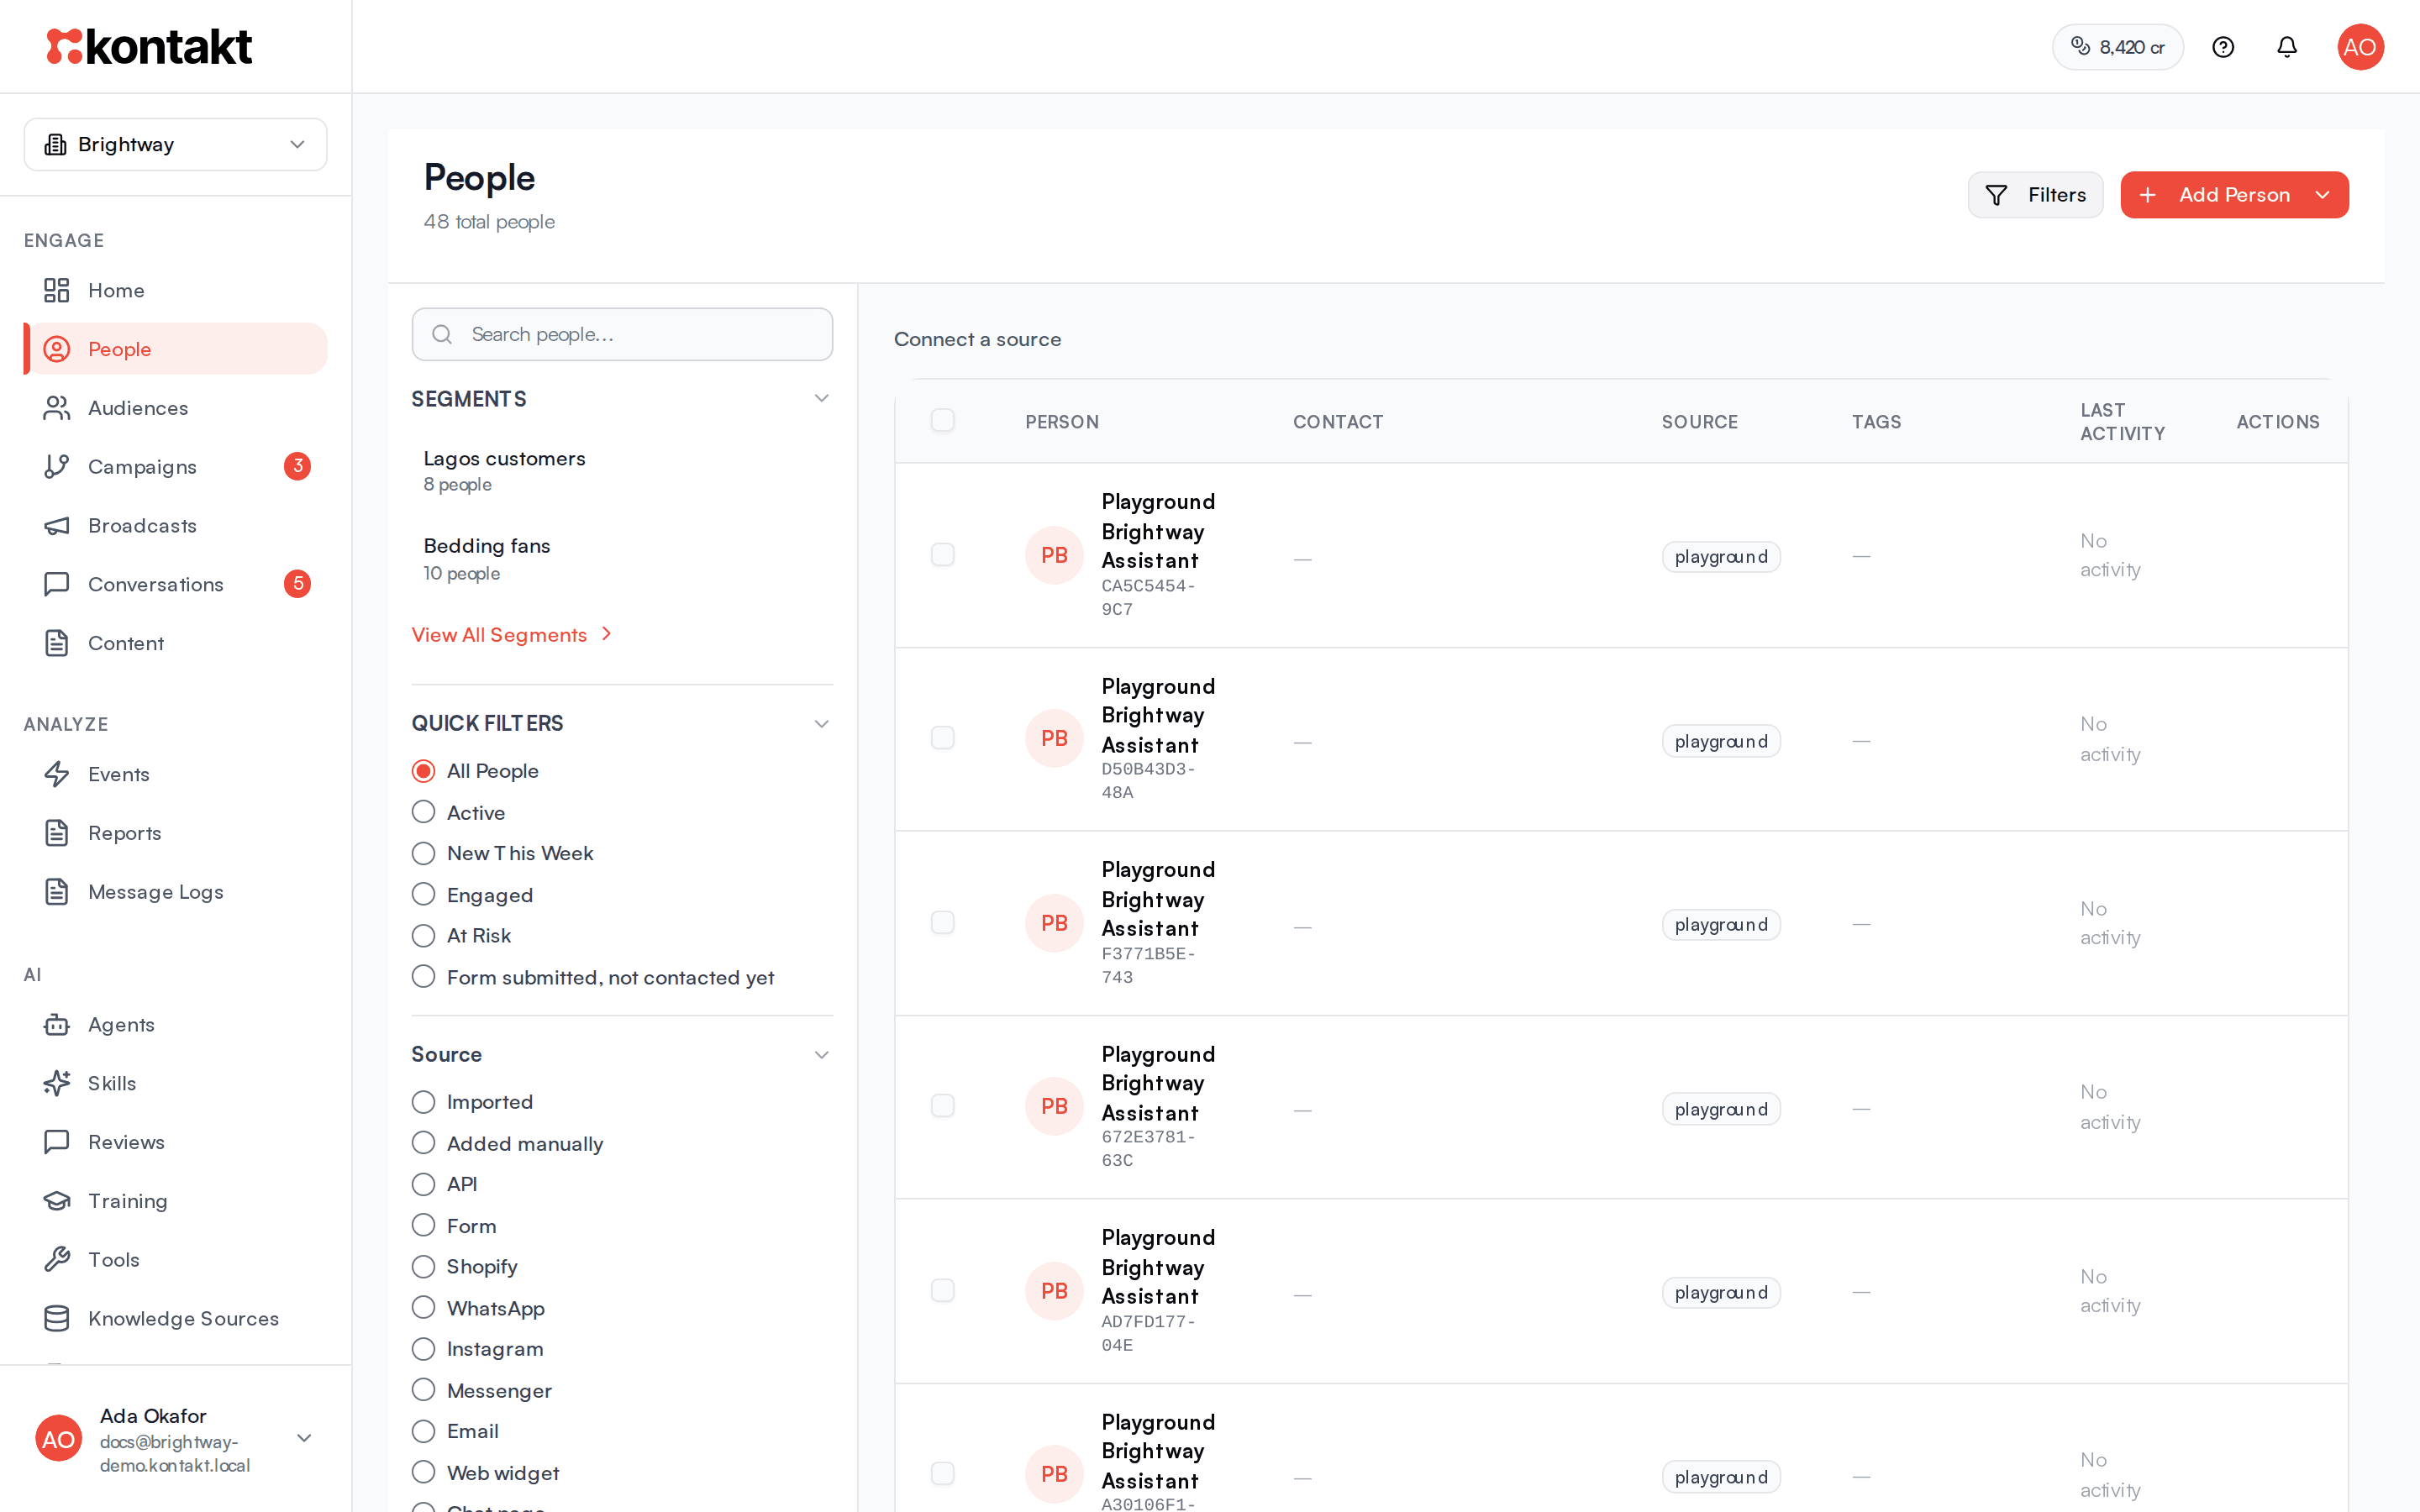
The table shows each Person (name, your own ID if set, and a tick for verified people), Contact, Source, Tags (the first two, then a count), and Last Activity. It shows 50 people per page. Use Previous and Next to move between pages.
Click Filters to open the filter panel:
- Search: "Search people..." matches name, email, phone, and your own ID.
- Segments: your first five audiences. Click one to open it, or View All Segments to go to Audiences.
- Quick filters: All People, Active, New This Week (added in the last 7 days), Engaged (activity in the last 7 days), and At Risk. Form submitted, not contacted yet shows people who submitted a lead form in the last 30 days and have not had an open conversation since.
- Source: where the person came from. Imported (CSV import), Added manually, API, Form, Shopify, WhatsApp, Instagram, Messenger, Email, Web widget, Chat page, Referral, plus any connected stores. The same sources are offered in the audience builder's Source condition.
- Fields: build a field condition, see how many people match, and click Save as audience to keep it. For anything more than a quick check, use the Audience builder.
Click Clear All Filters to reset. If a store is connected, a strip at the top shows its sync status. Otherwise Connect a source takes you to Settings / Connectors.
Add a person
Start
Click Add Person, then Add Single Person. To add many people at once, choose Import from CSV instead. See Importing contacts.
Basic Information
Enter First Name, Last Name, Email Address, and Phone Number. Include the country code in the phone number, for example +44 7700 900123. Pick an Account Manager if one teammate owns this customer.
Leave Auto-generate Person ID ticked if you don't use your own customer IDs. To use your own, untick it and type the ID in "Enter custom person ID".
Custom Attributes
Workspace fields are listed ready to fill in. Click Add Field to pick another field, or Create New Field to add one. See Fields and tags.
Tags
On Tags & Segments, type a tag and press Enter or click Add. Existing tags are suggested as you type. A tag that doesn't exist yet shows Create "name" and is created when you save.
Save
Click Create Person. The new profile opens.
People added this way get the source Added manually and the status Active.
Read a profile
Click a person to open their profile. The header shows their name, your ID, status, Verified if confirmed, their score, and an Opted out of marketing badge if it applies.
| Tab | What it shows |
|---|---|
| Overview | Contact information, recent activity, customer details (status, source, engagement score, lifetime value, created, last activity), AI insights, account manager, custom fields, computed fields, commerce and referral details, and tags. |
| Events Timeline | Events received for this person, marked API Event, and an activity log of changes. |
| Conversations | Every conversation with this person by channel and status. Click one to open it in the inbox. |
| Wallet | Points balance, lifetime earned and burned, and transaction history. See Loyalty wallet. |
From a conversation, click the customer's avatar or View profile to open the same page. The back link returns you to where you came from.
Edit or delete a person
Click Edit on the profile, or Edit Person from the row menu in the list. Change the details and click Update Person. Saving replaces the person's tags with the ones in the form, so removing a tag there removes it from the person.
To delete, open the row menu and click Delete Person, then confirm. The person is removed from the list and stops counting toward your contact limit. Deleting can't be undone.
To act on several people at once, tick their rows. The bar that appears offers Add Tags and Delete.
Message a person
Click Start Conversation on a profile, or Send Message in the row menu. The inbox opens the New Conversation steps with that person already picked. See Start a new conversation.
Email addresses are unique
Two people in a workspace can't share an email address. Saving a duplicate fails with "Email already in use". Search for the existing person instead.
Account manager
An account manager is the teammate who owns a customer relationship. Set it in Account Manager on the add or edit form, or with an account_manager column when importing. The profile's Account Manager card shows who it is, or "No account manager assigned".
When Routing uses the Account Manager strategy, that person's new and escalated chats go to their account manager. Only active teammates can be chosen.
Consent and opt-outs
Kontakt tracks WhatsApp marketing consent on each person.
How someone opts out. A person is marked as opted out when they:
- Send a WhatsApp message that is exactly
stop,unsubscribe,stop promo,stop promotions, orcancel(any capitalisation). - Tell WhatsApp to stop marketing messages from you, which Meta reports back to Kontakt.
- Are marked as opted out by your systems through the API or a connected store's consent settings.
How someone opts back in. They send start, subscribe, or unstop, or an admin or manager clicks Clear next to the Opted out of marketing badge on their profile.
What it changes.
- Broadcasts and journeys skip marketing templates for opted-out people. Utility and other non-marketing templates still send.
- In the inbox, picking a marketing template shows a warning, but you can still send.
- Opt-outs and opt-ins are recorded as events on the profile.
Hover the badge to see the date they opted out. See Contact policy for frequency rules.
Troubleshooting
I can't add a person
You may have reached your plan's contact limit. Delete people you no longer need, or upgrade. See Plans.
The same customer appears twice
People are matched by phone number and email. If one record has +234... and another has the number without +, they are treated as different numbers. Keep phone numbers in international format with +.
I don't see the Clear button on an opt-out
Only admins and managers can clear an opt-out. Ask one of them, or ask the customer to send start.